Hardware and radio connection
What you need to connect the phone to your radio, and how to do it.
How it connects
The phone is not wired to the radio. A small portable bridge sits in between: on one side it speaks Bluetooth to Android, on the other it speaks RS-232 to the radio's serial port. The setup has been designed, built and tested on a suitable radio.
Compatible radios
| Radio | Status | Notes |
|---|---|---|
| Suitable radio with a serial port (the one used in testing) | tested | Data exchange with the ESP32 bridge works. |
| Other radio with a Data Mode | not verified | Needs a serial port and a data transmission mode. Check the port's voltage levels and speed. |
A suitable radio is used for development; it has a serial port and exchanges data at 9600 baud. The radio handles the data by itself, with no extra settings from the user. Whether you need a straight cable or a Null Modem depends on whether the radio's port acts as DTE or DCE. The right choice comes from that radio's manual.
Connection and flow control
The IRIS 1 adapter was tested with a radio that uses a three-wire serial port: TX, RX and GND, at 9600 baud (8N1). This connection has no flow-control signals, so the app paces the transmission itself: it sends at a rate that matches the speed of the serial line and confirms delivery with CRC and ACK.
The adapter can also be adapted for radios that use flow control (RTS/CTS) or status signals (DTR/DSR). This requires a hardware change, namely a level converter with more channels than the MAX3232 used today (e.g. MAX3243), plus a matching firmware setting. It only works if the radio supports these signals and uses them the way its manual describes.
Not tested. Flow-control operation has not been tested yet. Before connecting to any radio, check its manual for what the serial port pins do, because on some models the RTS/DTR lines can control the transmitter.
The IRIS 1 adapter
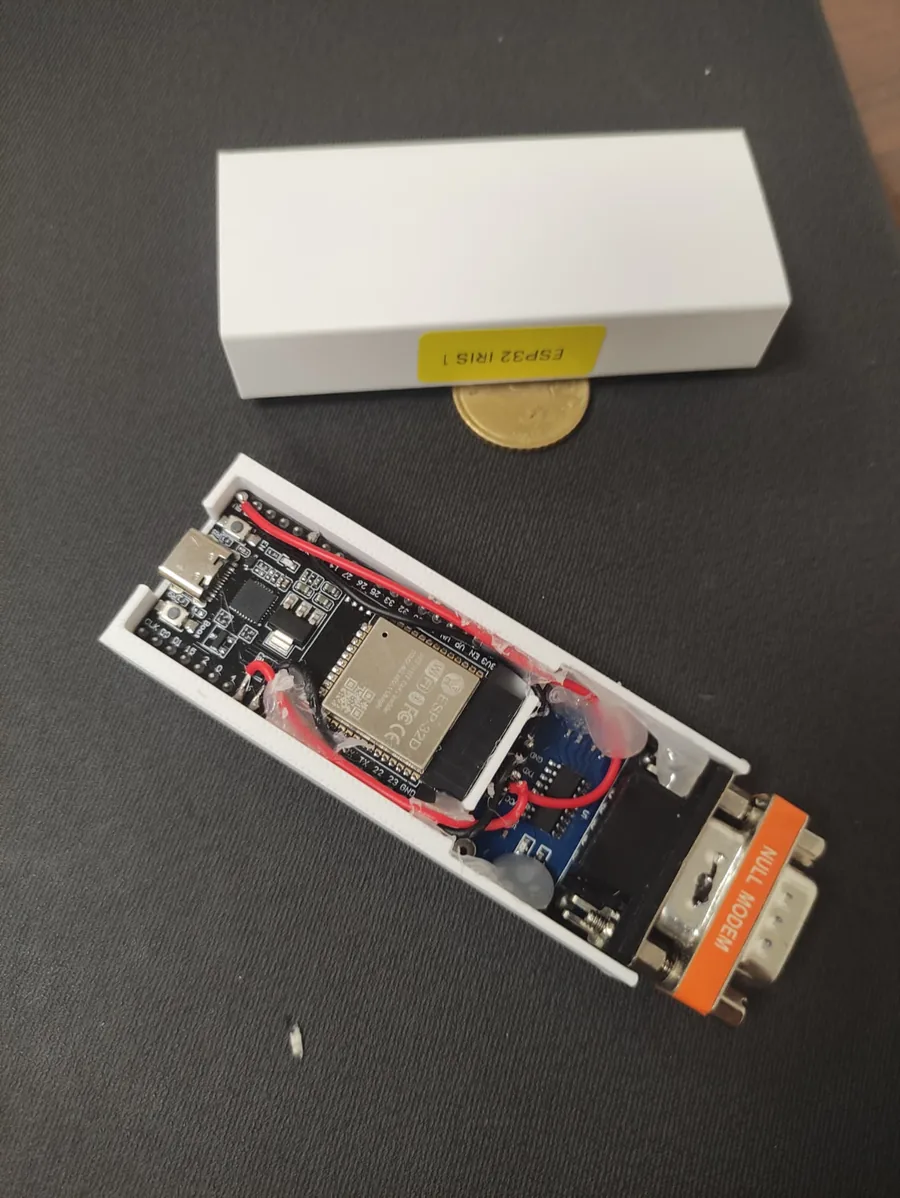
The bridge is called IRIS 1 and shows up on the phone as a Bluetooth device with that name. It does not interpret the data. Whatever the app sends goes out as a serial stream to the radio, and whatever the radio receives goes back to the app. It is built from inexpensive off-the-shelf parts.
Working prototype. The setup works with a suitable radio, but development continues.
Parts and cost
Indicative retail prices (eBay, AliExpress, electronics shops), 2026. The part photos are illustrative.
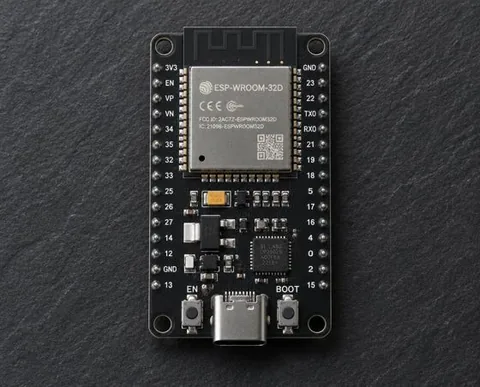
ESP32 DevKit
ESP32-WROOM-32D, USB-CBluetooth Classic SPP to the phone and UART2 to the converter. Powered and programmed over USB-C.
≈ 6 – 10 €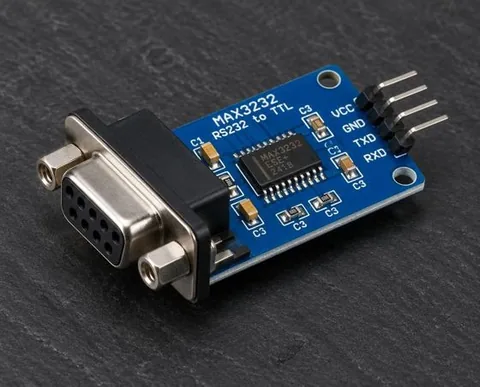
HW-707
MAX3232Converts the ESP32's 3.3 V logic levels to RS-232 levels and back.
≈ 2 – 4 €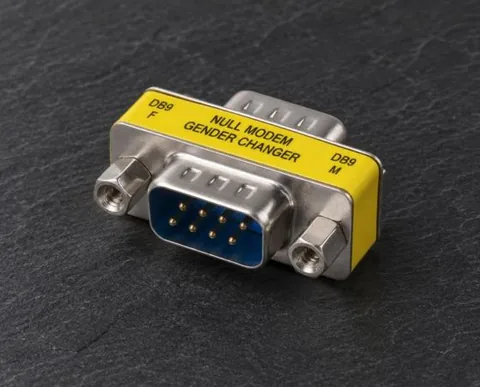
DB9 adapter
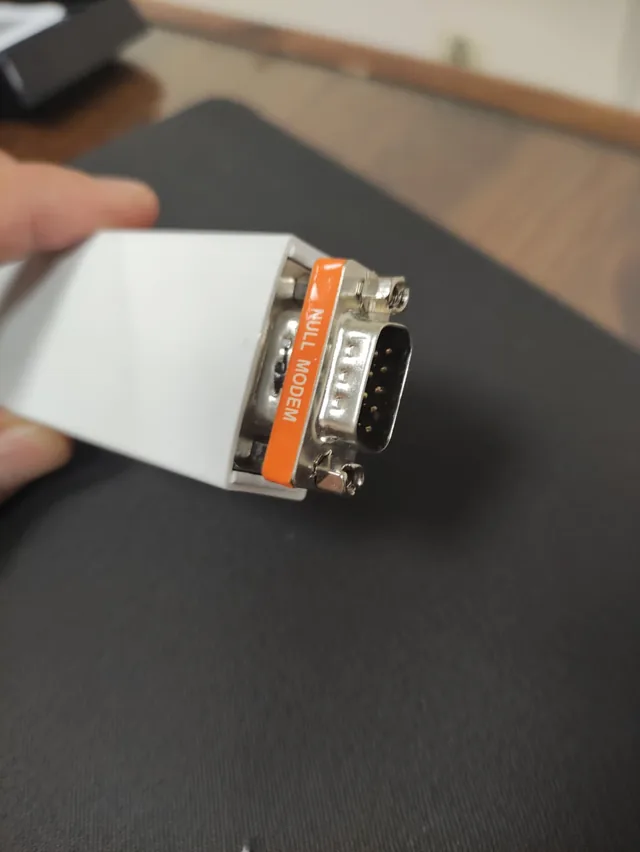
Null Modem / gender changerFixes the port gender and, if needed, crosses TX and RX, depending on whether the radio is DTE or DCE.
≈ 2 – 5 €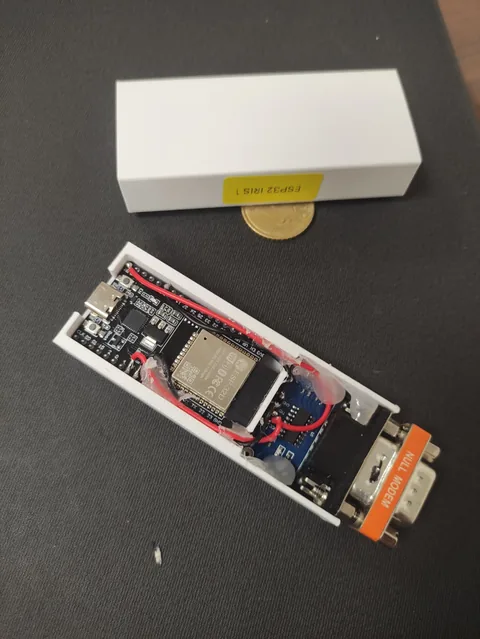
3D-printed case
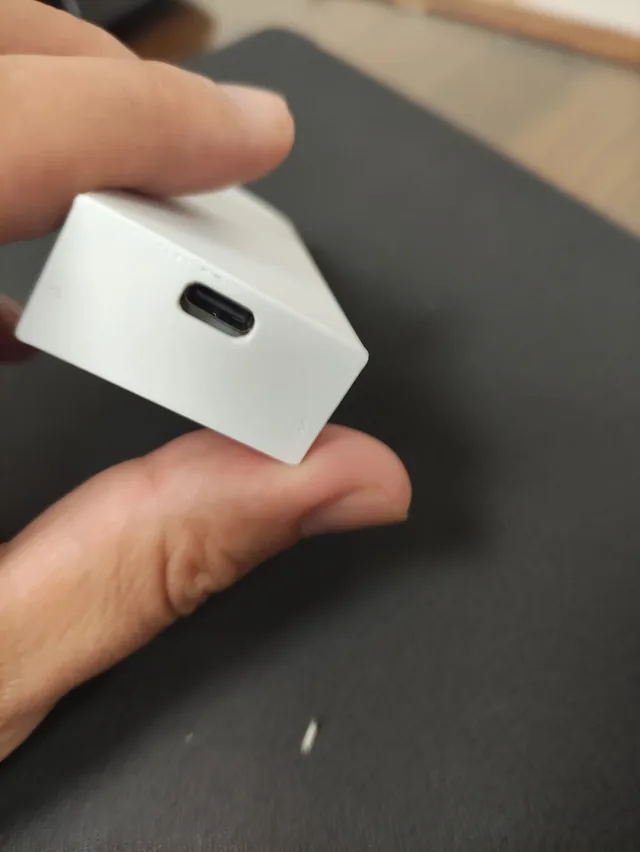
PLA or PETG, 2 partsHouses the two boards. An opening for USB-C at the back and DB9 at the front. The STL files are further down.
≈ 1 – 3 €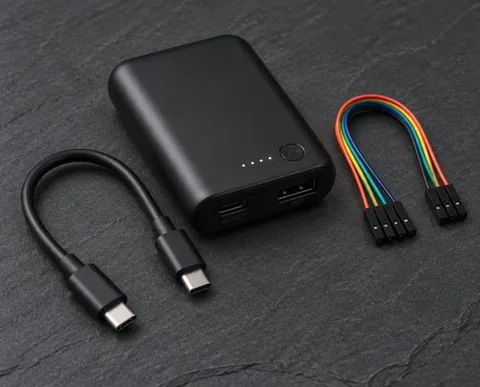
Power and cables
Power bank, USB-C, DupontAny 5 V USB source. Dupont wires and hot glue for the connections.
≈ 2 – 4 € (without power bank)Estimated total cost≈ 13 – 26 €
Wiring
Only TX, RX, GND and power are connected. No flow-control signals (RTS/CTS, DTR/DSR) are driven.
| ESP32 | HW-707 (TTL) | Note |
|---|---|---|
GPIO17 (TX2) | RXD | The ESP32 sends to the converter |
GPIO16 (RX2) | TXD | The ESP32 receives from the converter |
GND | GND | Common ground |
3V3 | VCC | Module power at 3.3 V |
Power the HW-707 at 3.3 V, not 5 V. The ESP32's GPIO16 does not tolerate 5 V. If the MAX3232 is powered at 5 V, its TXD output reaches a level that can destroy the ESP32. The MAX3232 works normally from 3.0 to 5.5 V.
Parameters
| Bluetooth name | IRIS 1 |
| Serial (RS-232) | 9600 baud, 8 bit, no parity, 1 stop bit (8N1) |
| Nominal throughput | about 960 bytes/s in each direction |
| UART2 buffers | 4096 bytes RX and 4096 bytes TX |
| Transfer per loop | 256 bytes |
| Logic level | 3,3 V |
There is no flow control. Bluetooth is much faster than 9600 baud. If the app sends a large amount at once, the buffers fill (4096 bytes take about 4 seconds to drain) and the extra bytes are lost with no error shown.
The app splits each message into frames with up to 255 bytes of payload plus a CRC16 (about 265 bytes per frame), but it does not slow down the sending rate. Send small messages, and for files expect a 60 KB file to take at least a minute.
ESP32 firmware
The same firmware runs on every adapter. If you build more than one, change only BT_DEVICE_NAME so they can be told apart when pairing. Board: ESP32 Dev Module, with the Arduino-ESP32 core (BluetoothSerial is built in).
View the code (124 lines)
/*
 * ============================================================================
 *  PC <-> PC Full-Duplex Bridge via Bluetooth SPP + RS-232
 * ============================================================================
 *  Architecture:
 *  [PC] <-BT-> [ESP32] <-UART2 TTL (IO16/IO17)-> [HW-707/MAX3232] <-RS232-> ...
 *
 *  Logic:
 *   - Whatever arrives over Bluetooth (i.e. from the computer) is written to Serial2
 *     (i.e. forwarded to the MAX3232 -> RS232 cable -> the other ESP32)
 *   - Whatever arrives on Serial2 (i.e. from the RS232 cable / the other ESP32) is
 *     written to Bluetooth (i.e. forwarded to the computer)
 *
 *  The exact same sketch is uploaded to both ESP32s (only BT_DEVICE_NAME
 *  changes, so you can tell them apart when pairing).
 *
 *  Pinout ESP32 (UART2 default):
 *    IO17 (TX2) -> RXD on the HW-707
 *    IO16 (RX2) -> TXD on the HW-707
 *    GND        -> GND on the HW-707
 *    3V3        -> VCC on the HW-707 (the module is powered at 3.3V).
 *
 *  Board: "ESP32 Dev Module" (ESP32-WROOM-32)
 *  Requires: Arduino-ESP32 core (BluetoothSerial comes built in).
 * ============================================================================
 */

#include "BluetoothSerial.h"

// ----------------------------------------------------------------------------
// Settings
// ----------------------------------------------------------------------------

// Change the name on each ESP32 so you can tell them apart when pairing
// e.g. "ESP32_BRIDGE_A" on the first, "ESP32_BRIDGE_B" on the second.
#define BT_DEVICE_NAME "IRIS 1"

// If you send "a lot" of data quickly and see data loss or stalls, the
// first suspect is this: BT SPP is much faster than the
// RS-232 serial line, so if your setup allows it (cable,
// MAX3232, and the other end), raise it, e.g. to 38400 or 115200 - less
// bottleneck = fewer losses. It must be the SAME on both ESP32s.
#define RS232_BAUD     9600
#define RXD2_PIN       16   // IO16 -> RX2 (receives from HW-707 TXD)
#define TXD2_PIN       17   // IO17 -> TX2 (sends to HW-707 RXD)

// Size of the intermediate buffer used to move data per loop() "cycle"
#define CHUNK_SIZE     256

// Larger internal buffers so that bursts of data are not lost while
// Serial2 (slower, 9600 baud) catches up and sends them out.
#define UART2_RX_BUFFER_SIZE  4096
#define UART2_TX_BUFFER_SIZE  4096

#if !defined(CONFIG_BT_ENABLED) || !defined(CONFIG_BLUEDROID_ENABLED)
#error Bluetooth is not enabled! Please run `make menuconfig` to enable it
#endif

BluetoothSerial SerialBT;

// ----------------------------------------------------------------------------
// Setup
// ----------------------------------------------------------------------------
void setup() {
  // Serial (USB) only for debugging/monitoring via the Arduino IDE, optional.
  Serial.begin(115200);
  delay(200);

  // We enlarge the buffers BEFORE begin() - otherwise it has no effect.
  Serial2.setRxBufferSize(UART2_RX_BUFFER_SIZE);
  Serial2.setTxBufferSize(UART2_TX_BUFFER_SIZE);

  // UART2 to the MAX3232 (HW-707) -> RS232 -> the other ESP32
  Serial2.begin(RS232_BAUD, SERIAL_8N1, RXD2_PIN, TXD2_PIN);

  // Bluetooth SPP (Serial Port Profile) to the computer
  SerialBT.begin(BT_DEVICE_NAME);
  // On arduino-esp32 core >= 2.x there is also SerialBT.setRxBufferSize(size)
  // (it must go BEFORE begin()). If your IDE finds it, uncomment:
  // SerialBT.setRxBufferSize(4096);

  Serial.println();
  Serial.print("[BOOT] Bluetooth device started, name: ");
  Serial.println(BT_DEVICE_NAME);
  Serial.println("[BOOT] Serial2 (RS-232 bridge) started at " + String(RS232_BAUD) + " baud");
  Serial.println("[BOOT] Bridge ready. Pair this ESP32 from the PC's Bluetooth settings,");
  Serial.println("[BOOT] then open the resulting virtual COM port in a terminal.");
}

// ----------------------------------------------------------------------------
// Loop: bidirectional data forwarding
// ----------------------------------------------------------------------------
void loop() {

  // ---- Direction 1: Bluetooth (PC) -> Serial2 (RS-232 -> the other ESP32) ----
  if (SerialBT.available()) {
    uint8_t buf[CHUNK_SIZE];
    size_t n = 0;
    while (SerialBT.available() && n < CHUNK_SIZE) {
      buf[n++] = (uint8_t)SerialBT.read();
    }
    if (n > 0) {
      Serial2.write(buf, n);
      // Serial.write(buf, n); // <- uncomment for debug echo on the USB monitor
    }
  }

  // ---- Direction 2: Serial2 (RS-232 <- the other ESP32) -> Bluetooth (PC) ----
  if (Serial2.available()) {
    uint8_t buf[CHUNK_SIZE];
    size_t n = 0;
    while (Serial2.available() && n < CHUNK_SIZE) {
      buf[n++] = (uint8_t)Serial2.read();
    }
    if (n > 0) {
      SerialBT.write(buf, n);
      // Serial.write(buf, n); // <- uncomment for debug echo on the USB monitor
    }
  }

  // No delay() needed - available()/read() are non-blocking and
  // both directions are served in turn on every pass of loop(),
  // effectively achieving full-duplex operation.
}
Build
STL files for the case
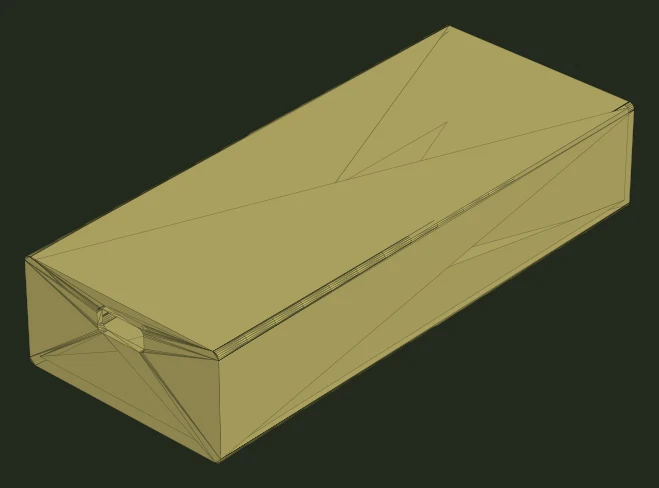
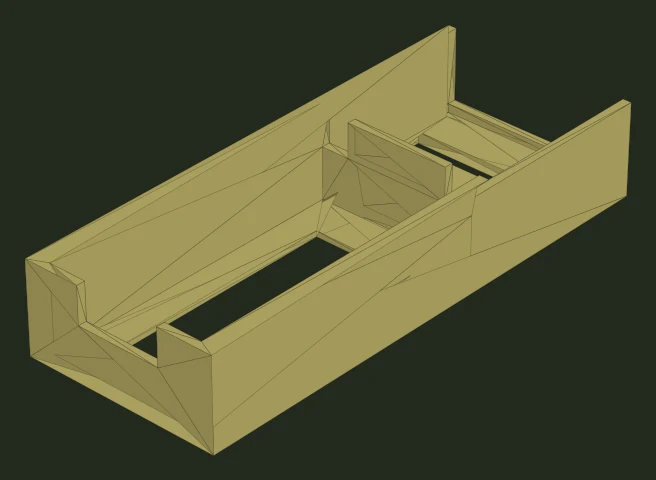
Two parts: the outer shell and the inside. The shell measures about 37 × 90 × 18 mm, as read from the file. Suggested settings: PLA or PETG, 0.2 mm layer, 20 % infill, no supports where possible.
Power
The device is powered from the ESP32's USB-C port. The board's regulator makes the 3.3 V for the ESP32 and the MAX3232, so any 5 V source will do.
| Source | Notes |
|---|---|
| Power bank | The most practical option for portable use. Consumption is about 0.1 to 0.25 A, so a 5000 mAh power bank lasts many hours. Some power banks switch off at very low current, so pick one with a “low current” or “always on” mode. |
| USB charger | Any 5 V phone charger (500 mA or more) for a fixed installation at the station. |
| Car lighter socket | A 12 V to USB adapter for use in a vehicle. Prefer a quality adapter for less noise near the radio. |
| Computer USB port | Powers the device and allows programming and monitoring from the Serial Monitor. |
Connecting step by step
Connect the bridge to the radio
Plug the bridge into the radio's serial port and power it. The radio must be in its data mode.
Pair in Android, not inside IRIS 3
Open the phone's Bluetooth settings and pair the bridge. IRIS 3 only lists devices that are already paired.
Allow Bluetooth
If the app asks for Bluetooth permission, accept it. Without it there is no communication at all.
Set the Network Key
Settings, NETWORK KEY, then Save Key. The exact same key must be on every device in the network. The key encrypts communication over the bridge.
Connect
Open Device Connection, open the Bluetooth panel, pick the bridge from AVAILABLE DEVICES and tap CONNECT. The status becomes ONLINE.
Test with a Net Check
Tap Net Check. Every other device answers with its callsign and appears in the diagram.
Status indicators
| ONLINE | Connected. Communication works. |
| SYNC | Connecting or reconnecting. |
| OFFLINE | Disconnected. |
The LAST DEVICE panel remembers the last successful connection for quick reconnection.
Troubleshooting
| What you see | Why it happens | What to do |
|---|---|---|
| The bridge is missing from the device list | It is not paired in Android. | Pair it in Android's Bluetooth settings, then tap SCAN. |
| I cannot open the connection | No Network Key is set. The connection step stays locked. | Settings, NETWORK KEY, Save Key. |
| ONLINE, but messages do not arrive | The key differs on even one device. It fails silently, with no error. | Re-enter the exact same key on every device. |
| Channel B is unavailable | The Bluetooth panel is not connected. | Connect the bridge first. |
| Someone does not answer the Net Check | They are on radio silence (auto-reply OFF), out of range, or answered late. | Check Settings, NET CHECK, and run it again. Hollow nodes are known but silent. |
| Large messages arrive incomplete, with no error | There is no flow control. Bluetooth fills the 4096-byte buffers faster than they drain at 9600 baud. | Send smaller messages and wait between transfers. |
| The file will not send | It is over 60 KB. | Reduce its size. If one chunk is lost the whole file is resent, which is why the limit stays small. |
| Changing Baud Rate does nothing | The value is saved but not yet applied to the active connection. | Do not use it to change the bridge's speed. The tested setup runs at 9600. |
| I do not see other people's positions | They have not enabled Share Position, or Location permission is missing. | Settings, LIVE POSITION, and check PERMISSIONS. |