Offline maps
Prepare the map before you lose the network. Two ways: download inside the app, or import your own file.
Three background types
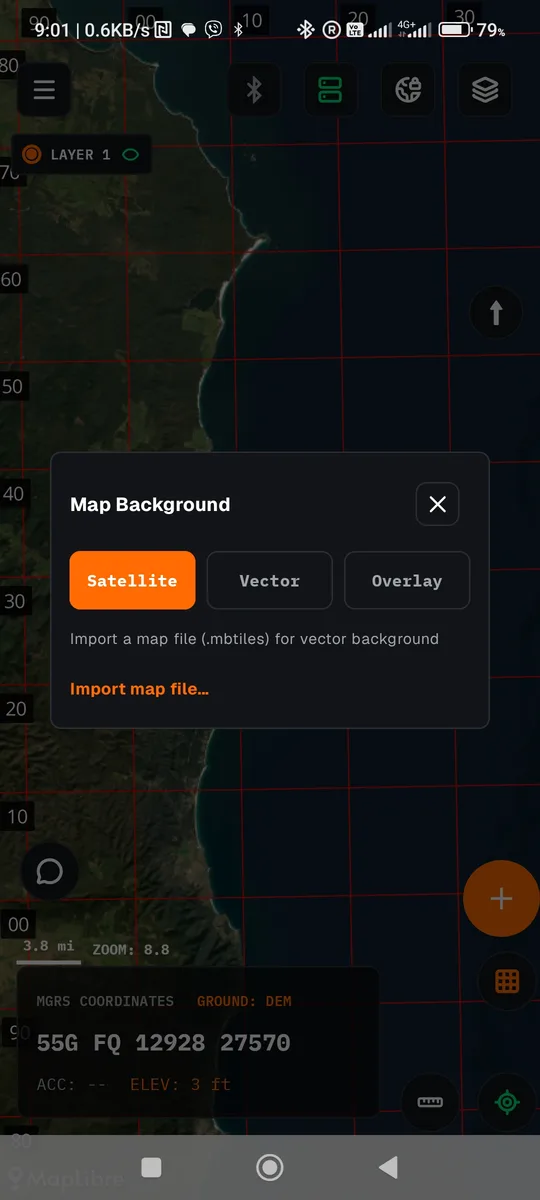
Open the layers button on the map. The Map Background panel has three modes.
| Mode | What it shows | What it needs |
|---|---|---|
| Satellite | Satellite imagery. This is the default. | Downloading the area while online (below). |
| Vector | Roads, towns and place names in a line-map style. | Your own .mbtiles file with vector tiles. |
| Overlay | The same roads and place names drawn over the satellite image. | A satellite download and an .mbtiles file. |
Download a satellite map
The download button saves the visible area of the map. Do it while you have a data connection.
Zoom to your operating area
Whatever is on screen is what will download.
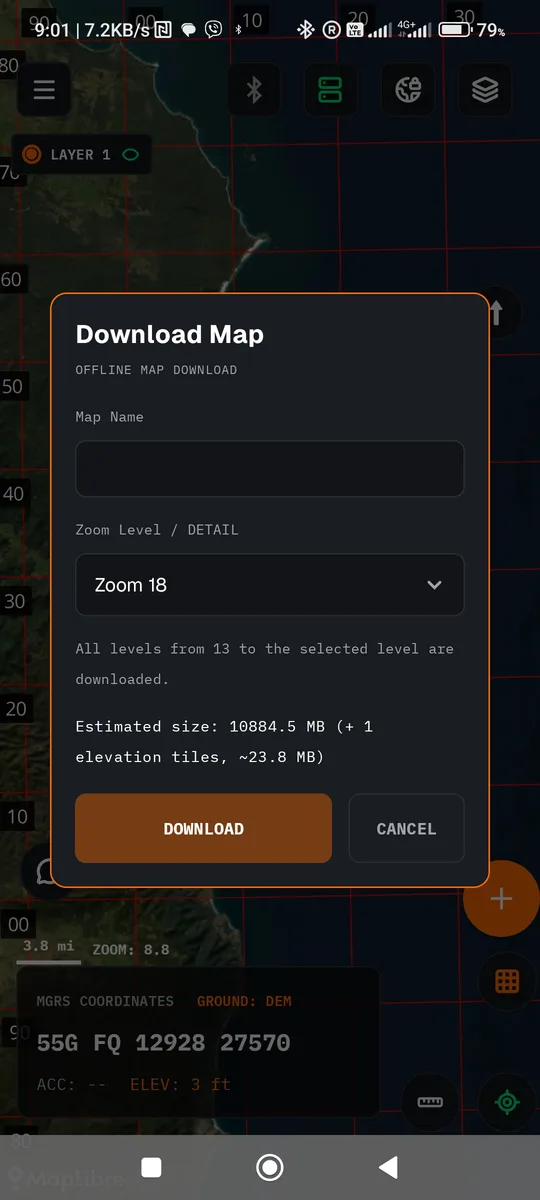
Tap the download button
Name the map and pick a detail (zoom) level. The app shows the estimated size before it starts.
Wait for it to finish
A bar shows “Downloading map... N%”. You can cancel at any time. Completion and failure are both shown explicitly.
Manage your areas
In the navigation drawer, under Maps (offline), each area can be shown, hidden or permanently deleted from the device.
Import an .mbtiles file
For Vector and Overlay you need an .mbtiles file with vector tiles, for example an OpenMapTiles export. Move it to the phone any way you like (USB, cloud storage, file sharing) and import it from the app.
Put the file on the phone
In any folder that Android's file picker can see.
Open the Map Background panel
Layers button on the map, then choose Vector or Overlay.
Tap “Import map file…”
Android's file picker opens. Choose the file. Files that are not valid .mbtiles or have no vector layers are rejected.
Pick the active file
You can keep several files, for example one per operating area. One is active at a time.
Where to get vector files MapTiler offers OpenStreetMap data as vector tiles in the OpenMapTiles schema, for zoom 0 to 14: maptiler.com/on-prem-datasets/dataset/osm. The page does not state pricing or licence terms, so check them before you download. Make sure the file you get is .mbtiles with vector tiles.
If the active file does not cover the area you are viewing, the app shows “The active map does not cover this area”.
Elevation data
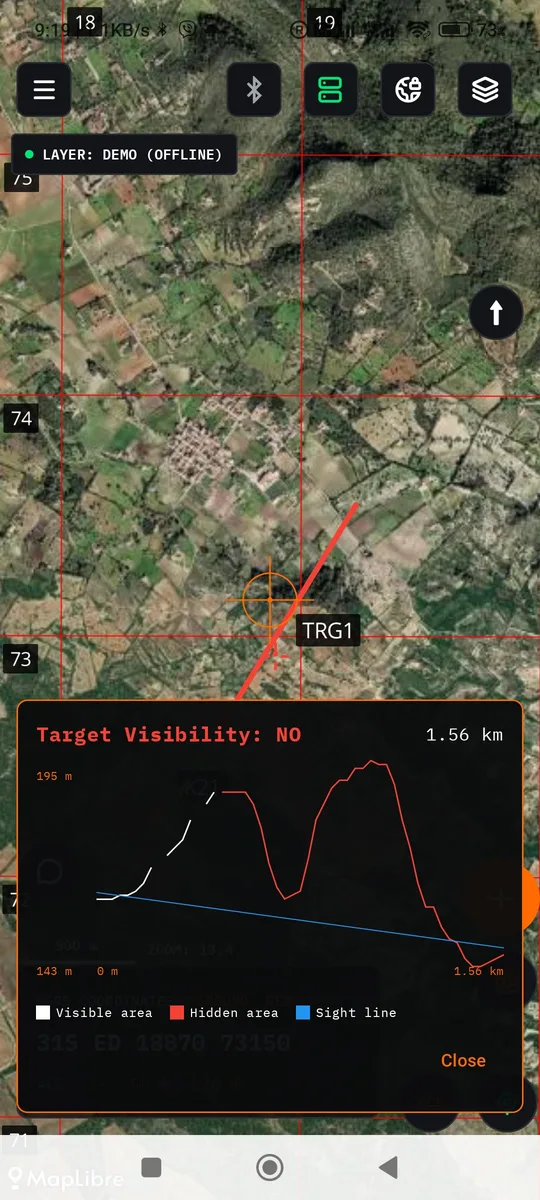
Line of sight (LOS) needs a connection. Elevation tiles do not download with the map. They download when you ask for them. Without a connection and without a previous download, the calculation fails.
Run an LOS calculation over your area before you leave so the data is saved.
Windows map downloader
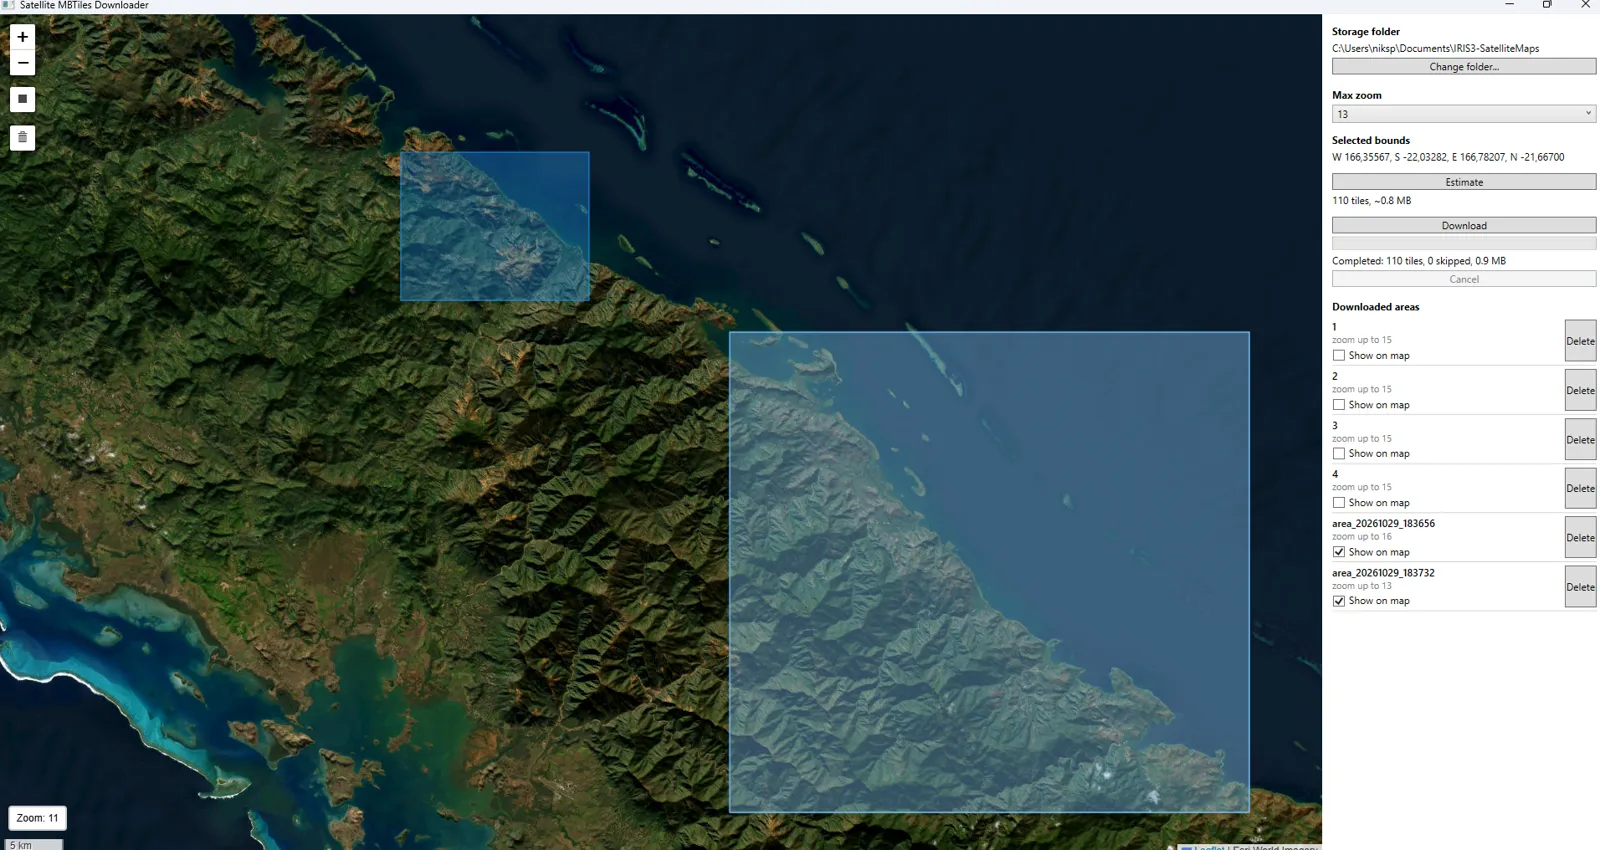
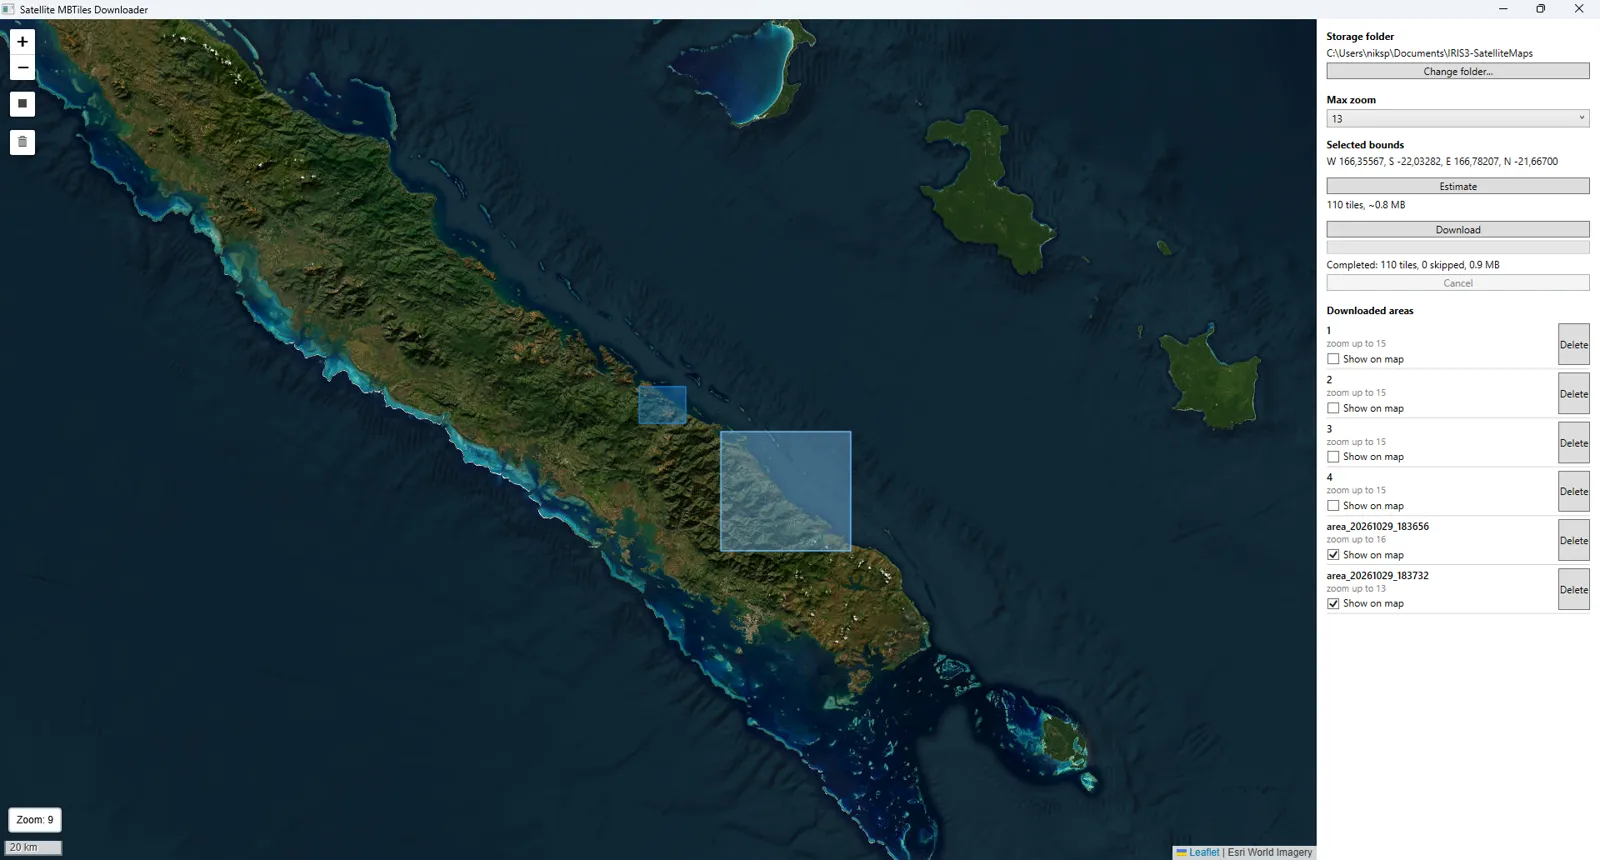
Satellite MBTiles Downloader is a Windows app that downloads satellite maps on your computer and saves them as .mbtiles files for IRIS 3. It is useful when you want large areas or high detail, with a fast connection and a big screen, before you go to the field.
How it works
Draw the area
Pan and zoom the map and draw a rectangle. Its coordinates (W, S, E, N) appear under “Selected bounds”.
Pick Max zoom
From 13 to 19. The lowest level is always 13. Each level above it increases the size a lot.
Press Estimate
It shows how many tiles and how many MB will download, before anything is downloaded. If it is too big, shrink the area or the zoom.
Press Download
Progress shows under the button and you can press Cancel. At the end it reports how many tiles completed.
Manage your areas
The “Downloaded areas” list shows each area and its zoom. “Show on map” shows or hides it on the map, and “Delete” removes it.
Where the files go
By default in Documents\IRIS3-SatelliteMaps. You can change it with “Change folder...”. Each area is a separate .mbtiles file.
Import on the phone
Copy the file to the phone
By USB, cloud or file sharing, into a folder Android's file picker can see.
Open offline maps
In IRIS 3: “Offline maps” → “SAVED MAPS” → “Import map”.
Choose the file
If the file is invalid or is not a satellite (raster) .mbtiles, the app rejects it with a message.
Do not mix up the two file types. The “Import map file…” button in the Map Background panel (above) accepts only vector .mbtiles. Files from the Windows app are raster satellite files and are imported from Offline maps.
Requirements and download
- Windows 10 or newer.
- Microsoft Edge WebView2 Runtime (already installed on most Windows 10/11 systems).
- An internet connection while downloading. Imagery comes from Esri World Imagery.
Satellite imagery: Esri World Imagery. You are responsible for following Esri's terms of use for how much you download and how you use it.
Vector and Overlay data comes from OpenStreetMap. Map data © OpenStreetMap contributors. OSM Bright style from OpenMapTiles.