How it communicates
Three ways to send: share, radio and server. What each does, what it needs and when to pick it.
The three channels
Every time you tap Send (on an entry, a table row, a layer, a fire allocation or a unit status), the app first asks where it should go. There is always an explicit Cancel, so nothing is sent over the radio or the internet by accident.
| Channel A | Channel B | Channel C | |
|---|---|---|---|
| Name in the app | Share | Via bridge | Via server |
| How it travels | Android's share menu (SMS, email, messaging apps) | Bluetooth to the bridge, then over the radio | The internet, through the rendezvous server |
| Who receives it | Whoever you pick in the app you opened | Every device on the network (broadcast) | One recipient: a known device or a group |
| What it needs | Nothing. Always available. | A connected Bluetooth link and the same Network Key | Server address, QR pairing and an internet connection |
| Works without a network? | Depends on the app you pick | Yes, this is its purpose | No, it needs the internet |
Channel A: share
It opens Android's standard share menu with ready-made text that describes the entry. From there you send it wherever you like: SMS, email or any messaging app on the phone.
- It is always available, even with no bridge or server connection.
- It does not go through the IRIS 3 network and needs no Network Key. Delivery depends on the app you picked, so it needs whatever network that app uses.
Channel B: over the radio
This is the field channel. It sends data digitally through the Bluetooth bridge and your radio, to every other device on the network. It is a broadcast, not a recipient choice: everyone who is connected and has the same key receives it.
What happens on the way
Phone to bridge
The phone talks Bluetooth Classic to the bridge (an ESP32 with a MAX3232 on a serial link to the radio). See the Hardware and radio page.
Encryption with the Network Key
Communication through the bridge is encrypted with the Network Key. Devices with a different key cannot exchange data.
255-byte pieces
Every message is split into pieces of up to 255 bytes, and the total cannot exceed 255 pieces. That is why the file limit is 60 KB.
Acknowledgement and retry
The app waits for an acknowledgement (ACK Timeout, default 2 s) and retries (default 3 times) before giving up. If even one piece of a file is lost, the whole file is sent again from the start.
The radio makes the network. Bluetooth only covers the distance from the phone to the bridge. It is not a Bluetooth mesh. Range between stations is your radio's range.
Setup step by step
Set the same Network Key everywhere
Settings → NETWORK KEY. With no key, nothing is sent or received. If it differs on even one device, that device is left out.
Pair the bridge in Android
Bluetooth pairing is done first in Android's own Bluetooth settings, not inside IRIS 3.
Device Connection
Pick the bridge from AVAILABLE DEVICES and press CONNECT. System Status reads ONLINE when connected, SYNC while connecting and OFFLINE when not.
Test with Network Check
Press Network Check and see who answers (below).
A wrong Network Key fails silently. The app will not say “wrong key”. Nothing simply arrives. Check the key on every device first.
Channel C: via server
It sends over the internet through the rendezvous server to one specific recipient, never to the whole network. As soon as you pick it, a second window “Choose recipient” opens with your Known Devices and Groups.
- Known device: an IRIS 3 device you have paired with a QR code.
- Group: a member list you build from your Known Devices. The message reaches exactly those members. Only the creator sees Edit and Delete.
The Bluetooth and Server panels can be open and connected at the same time: Bluetooth to the bridge and Server to other devices over the internet.
Setup step by step
You need a server that is already running (see Setting up a server) and its address, e.g. https://iris3.example.org.
Connecting the app to the server
Open Communication Setup
On the Android device: Settings → “Communication Setup”. Alternatively, from the header icon on the map, with a long press → “Settings”.
Network Key
In the first step of the screen enter the shared encryption key that all the devices of your network use, and press “Save”. Without it, the connection step stays locked. The same key goes on every device: the server does not send it, it is set locally.
Add or choose a server
In the connection step open the “Server” dropdown, press “Add new server” and fill in Name (e.g. “Main”) and Address in the form
https://host:port. The address is saved in the list so you can pick it again later.Connect
Press the connect button in the top status strip for the server. When the indicator turns “connected”, the app has an active channel to the server and is ready to pair.
Pairing devices
You can pair as many devices as you like, not just two: repeat the steps for each new device. All of them must already be connected to the same server with the same network key. An expired code is rejected, and you cannot pair with your own device.
One device creates a code
In the “Create code” step press the button. A QR code appears, with a matching text code and an expiry countdown. The code expires after a few minutes. If it expires before it is scanned, press the same button again for a new one.
The other scans the code
In the “Scan code” step the camera opens full screen (grant camera permission if asked). Scan the first device's QR.
Name the new device
After a successful scan, the app asks for a name for the device you just paired (e.g. “Platoon 2”). Type it and press “Save”.
Confirmation
A success message appears. Close the dialog. The device now shows in “Known Devices” and can be put in a group or receive messages and fire distribution.
Alternatively, with Bluetooth. If there is no server access, the same screen supports direct pairing over Bluetooth. The device must already be bonded in Android's Bluetooth settings. The list only shows bonded devices, not scan results.
BOTH mode. If Server and Bluetooth are active at the same time (transport mode “BOTH”), connecting to a bonded device does not close the server leg. The two channels stay independent.
What you can send
| What | How |
|---|---|
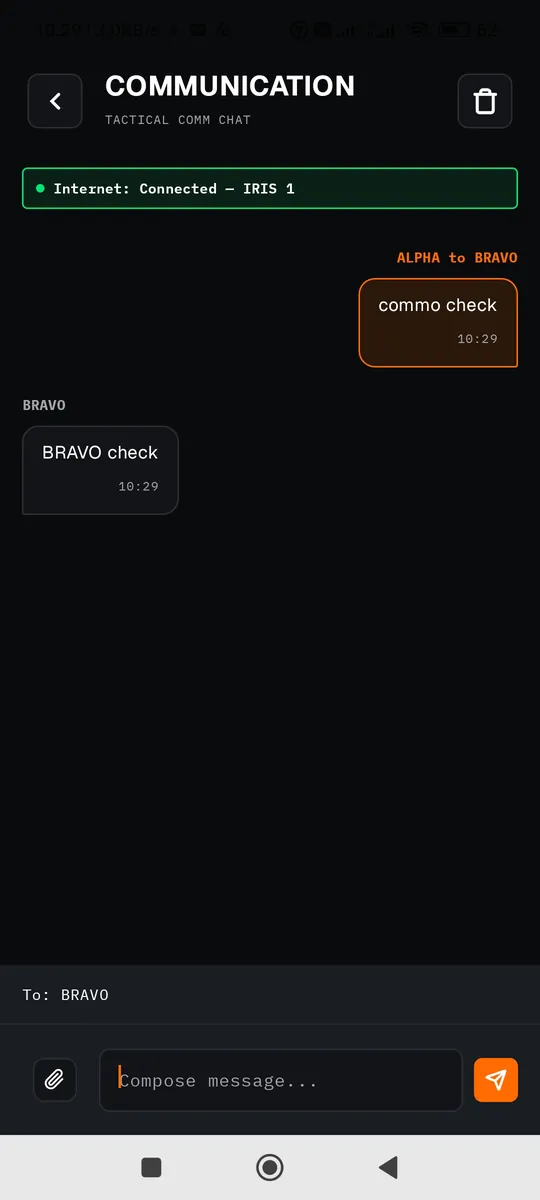
| Text messages | Field chat. Each bubble shows the sender's call sign. |
| Files | With the paperclip in the chat, any type, up to 60 KB. Anything larger is rejected at once. The recipient finds it automatically in Downloads. |
| Entries and layers | With the Send button on targets, observers and layers. |
| Target assignment to a fire unit | Arrives as a message with the target as a link that opens the map on it. |
| Unit status | A structured report of personnel, equipment and ammunition. Reports from others are collected on the Unit Statuses screen. |
| Live position | Settings → LIVE POSITION → Share Position. Sends your GPS position at the interval you set (in minutes). Other people's positions show as markers on the map. |
Network check
A one-tap “radio check”. Your device sends a request and every other device on the network answers automatically with its call sign, after a short random delay so they do not all answer at once. The result shows as a diagram or a table.
| Node | Meaning |
|---|---|
| Your device | The one that started the check. |
| Answered on time | Good link. |
| Answered late | Weak link. |
| Unfilled | Known from an earlier check, but silent now. |
In Settings you can turn off the automatic answer (radio silence) and set the answer window, which is 7 seconds by default.
If nothing arrives
| Symptom | Check |
|---|---|
| Nothing is sent or received | Network Key: it must exist and be identical on all devices. |
| Channel B is not available | The Bluetooth panel must be connected (ONLINE). |
| Channel C is not available | The Server panel must be selected or connected, and a server address must be set. |
| “No saved recipients” | You have not paired with any device by QR yet. |
| “Invalid or expired code” | Create a new code and scan it before it expires. |
| The file will not send | It must be 60 KB or less. |
The Baud Rate setting is saved, but for now it is not applied automatically to the active connection.